 |
| Photo by Alena Darmel: www.pexels.com |
The way artists compose, record, and produce their music has been changed by guitar recording software. Thanks to technological developments, guitarists today have access to a variety of software programs made expressly for recording and editing guitar sounds.
For musicians, guitar recording software has many advantages. First off, it makes it simple to record and edit guitar parts as part of a wider production thanks to its seamless interface with digital audio workstations (DAW). This gives guitarists the freedom to experiment with various sounds and effects, layer different guitar tracks, and create records of a high caliber.
Many guitar recording software programs include virtual amplifiers, effects pedals, and amp modeling tools in addition to basic recording features. The sound of different vintage or modern amplifiers can be replicated by guitarists using these features.
Here are the list of well known guitar recording softwares that often used by professional musicians.
#1 FL Studio
This software used to be known as Fruity Loops and it is compatible with both Windows and Mac. It has a user-friendly interface and a variety of plugins and effects for guitar recording.
How to use FL Studio:
- 1. Connect your guitar to your computer via an audio interface or a USB cable.
- Launch FL Studio and create a new project.
- Add an audio track by clicking on the + icon at the bottom of the playlist window.
- Select your input device from the drop-down menu on the mixer channel.
- Arm the track for recording by clicking on the red circle button next to the track name.
- Press R on your keyboard or click on the record button at the top of the playlist window to start recording.
- Press spacebar or click on the stop button to stop recording.
#2 Ableton Live
This software is also compatible with both Mac and Windows and it is designed for live performance and production. It has a unique session view that allows you to arrange clips of audio and MIDI in a non-linear way.
How to use Ableton Live:
- Connect your guitar to your computer via an audio interface or a USB cable.
- Launch Ableton Live and create a new set.
- Add an audio track by right-clicking on an empty space in the session view and choosing Insert Audio Track.
- Select your input device from the drop-down menu on the track header.
- Arm the track for recording by clicking on the red circle button next to the track name.
- Click on an empty clip slot in the session view to start recording.
- Click on another clip slot or press spacebar to stop recording.
#3 Cubase
This software is one of the most professional and advanced DAWs for guitarists. It has powerful editing, mixing, and mastering tools, as well as a large collection of virtual instruments and effects. It is only available for Windows.
How to use Cubase:
- Connect your guitar to your computer via an audio interface or a USB cable.
- Launch Cubase and create a new project.
- Add an audio track by clicking on Project > Add Track > Audio
- Select your input device from the drop-down menu on the track inspector.
- Arm the track for recording by clicking on the red circle button next to the track name.
- Press * on your keyboard or click on the record button at the bottom of the project window to start recording.
- Press spacebar or click on the stop button to stop recording.
#4 Logic Pro X
This software is a Mac-exclusive DAW that has a sleek interface and a rich library of sounds and effects. It also has a feature called Smart Controls that lets you adjust various parameters of your guitar tone with ease.
How to use Logic Pro X:
- Connect your guitar to your computer via an audio interface or a USB cable.
- Launch Logic Pro X and create a new project.
- Add an audio track by clicking on Track > New Audio Track
- Select your input device from the drop-down menu on the channel strip.
- Arm the track for recording by clicking on the red circle button next to the track name.
- Press R on your keyboard or click on the record button at the top of the control bar to start recording.
- Press spacebar or click on the stop button to stop recording.
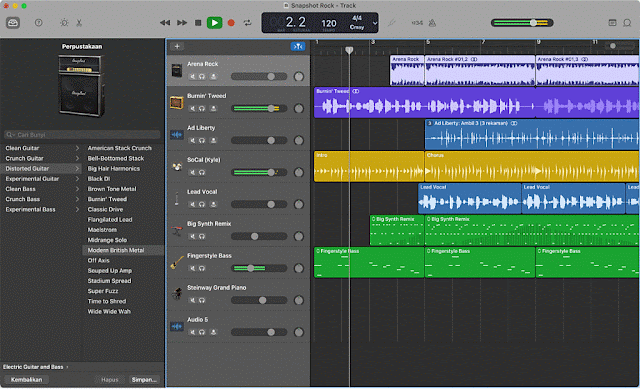
#5 GarageBand
This software is a free and easy-to-use DAW for Mac and iOS devices. It has a variety of presets and effects for guitar recording, as well as a virtual amp designer and pedalboard.
How to use GarageBand:
- Connect your guitar to your computer via an audio interface or a USB cable, or use an iOS device with a compatible adapter.
- Launch GarageBand and create a new project.
- Add an audio track by clicking on + > Audio Recorder
- Select your input device from the drop-down menu on the track header.
- Arm the track for recording by clicking on the red circle button next to the track name.
- Press R on your keyboard or click on the record button at the top of the control bar to start recording.
- Press spacebar or click on the stop button to stop recording.


